-edible zone-
-- I have been the owner of my Thorens TD124 MkII Serial # 89989,
since the early 1970s. In 2014 I had it serviced by Juerg Schopper in
Switzerland. This year (2018) I fulfilled a long held aim to design and
build my own custom plinth. I am a luthier by trade, so the necessary
tooling and skills needed for this task were not an issue. It was just a
matter of finding the time! In keeping with the Thorens design, the
overall intention has been to create a very high quality, vintage style
plinth to complement the beauty of this classic Swiss turntable.
Derek M Hall
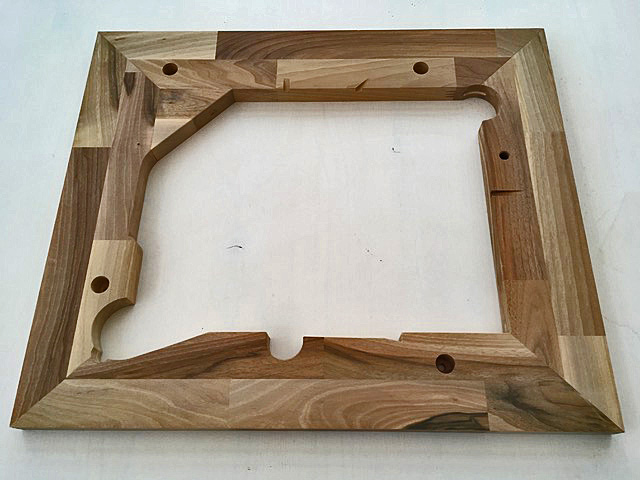
Building a custom plinth for my Thorens TD124
commenced with the top, fabricated from multiple staves of European
Walnut, each 21mm thick by 40mm wide. It started out rather like making
a picture frame with mitred corners. I then cut the inner profile so
that the Thorens chassis fits snugly i.e. with minimum clearance, and
drilled the necessary holes for the rubber ‘mushroom’ shaped dampers on
which the chassis is suspended. As a luthier I work to tolerances of
.01mm and use hide based glues for my joints. But on the plinth I used
PVA glue which allows longer set up time. I used no metal fasteners in
any of the joints. They are simply glued and cramped.
*
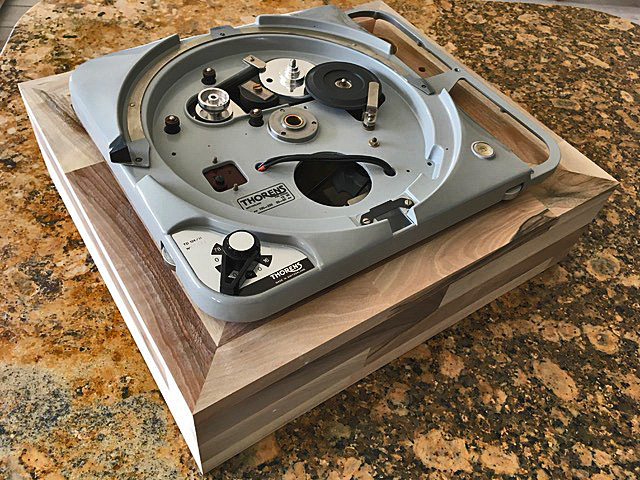
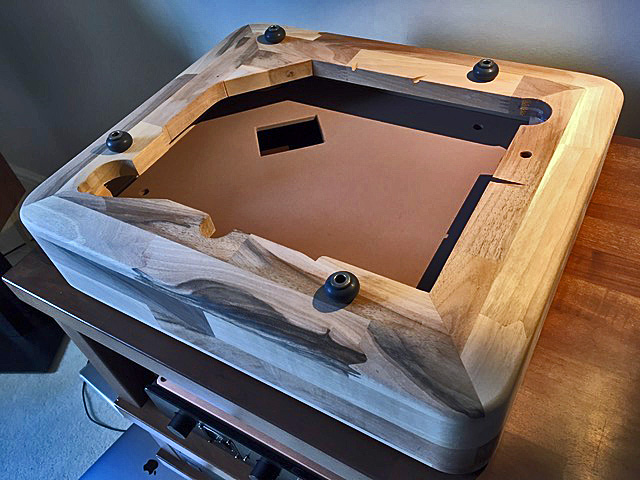
-- The next stage involved making a carcase or box-like structure the same size as the top - again from staves of Walnut, The sides of the box are 21mm thick and mitred at the four corners. Each corner is braced inside with a quadrant of solid beech. The height of the box was determined by the depth of my tonearm and its DIN connector. The top was then glued down onto the box to form the basic plinth. Note that there is no equivalent ‘base' to the box - the bottom is left ‘open’ for reasons that become clear later.
*
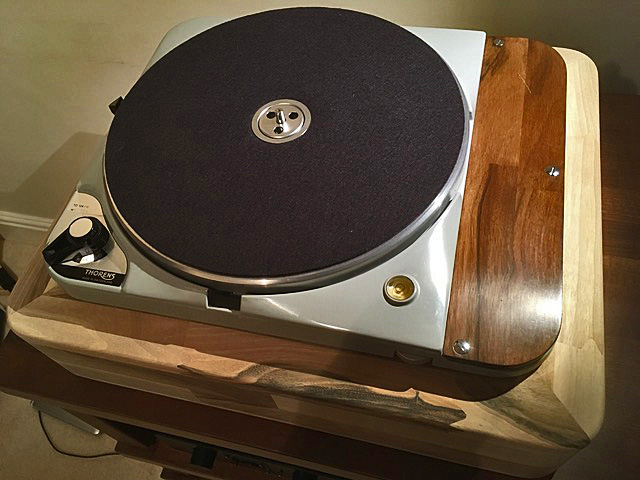
-- At this point in the process I decided to replace the tone arm mounting board that came with the Thorens turntable. The original mount was made from black plastic and I wanted a Walnut board to match the Walnut plinth. I used the new mounting board as an opportunity to experiment and determine the final finish of the plinth. So the mounting board was colour toned with water-based stains and then lacquered with a water-based clear urethane finish. I preferred a silk-like finish rather than high gloss. It was also at this stage that the plinth took on its final shaping. The previous flat top surface now has a gentle slope that emulates that of the Thorens chassis, and the corners of the plinth have been radiused - again in keeping with the turntable chassis.
*
-- I then turned my attention to building a base on which the plinth would sit. The idea was to further isolate the Thorens from vibration coming from other equipment in the system. I had four air-damped pods for this purpose that I wanted to place at the four corners of the plinth. But this would mean the plinth being raised by about 40mm from the hi-fi rack. I decided to avoid this by incorporating the four pods into the inner structure of the plinth. The four, height adjustable pods are shown on my Walnut hi-fi rack in the following shot:
*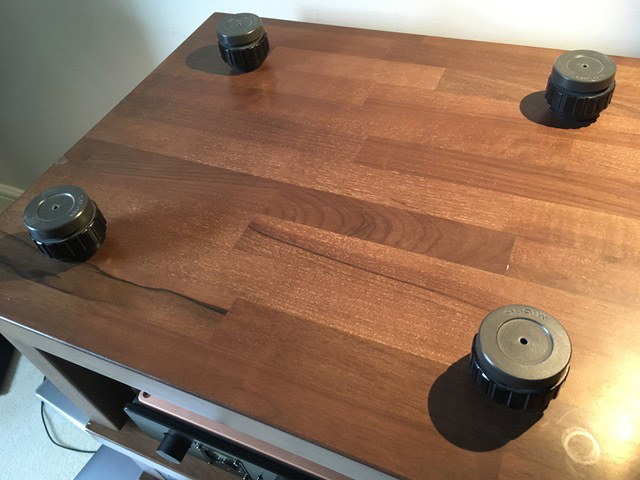
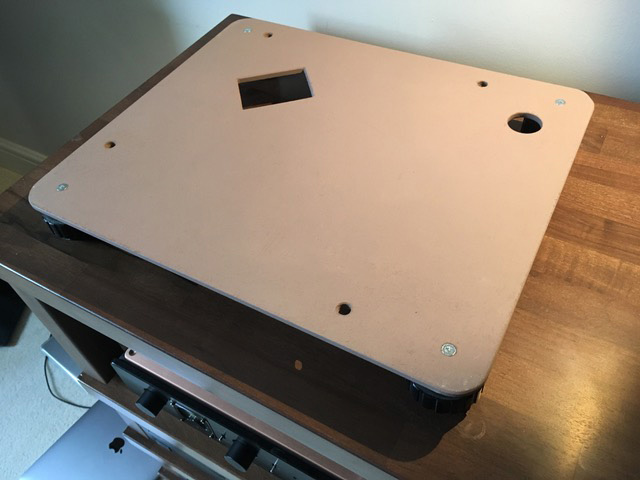
-- The pods were each drilled and tapped with a thread so that I could then attach them with small screws to a base made from MDF board. The board is shaped to fit inside the Walnut plinth, with a couple of mm gap on all sides. Note some cut-outs in the board to provide clearance for the Thorens motor, and my tone-arm pillar.
*
-- The plinth is then lowered down onto this base and simply rests on it at the four corners. The MDF board, with its four air-damped pods underneath, butts up against the four beech corner braces inside the plinth so that no element of the turntable chassis or the tone arm is in direct contact with the board.
*
-- The pods are height adjusted so that the Walnut plinth is suspended with a 1 to 2mm gap above the hi-fi rack and hence with the pods not visible.
*
-- Drilling a hole for the precise location of the tone-arm (to ensure optimum stylus geometry) meant marking out the centre using a set of trammel heads - a tool I use in luthery for marking large radius arcs - together with a spirit level!
*
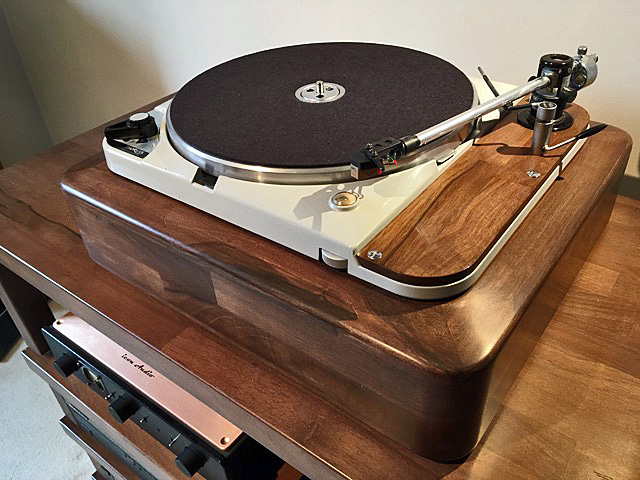
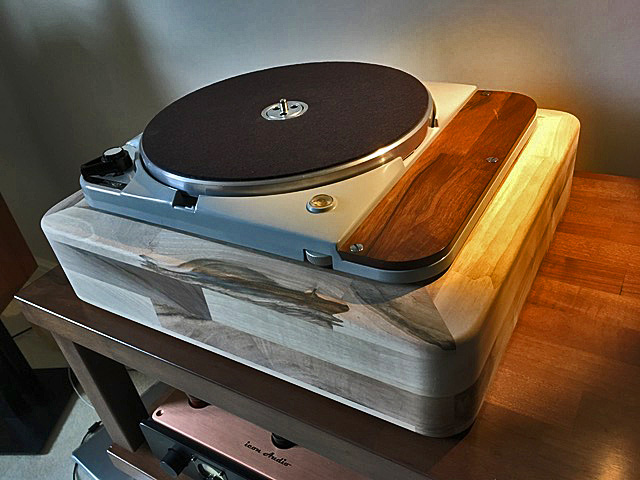
-- The finished plinth matches the Walnut hi-fi rack that I previously made, and complements the Thorens turntable beautifully. The tone-arm is an early version of the Decca International arm and is fitted with a Decca London Gold cartridge.
--#